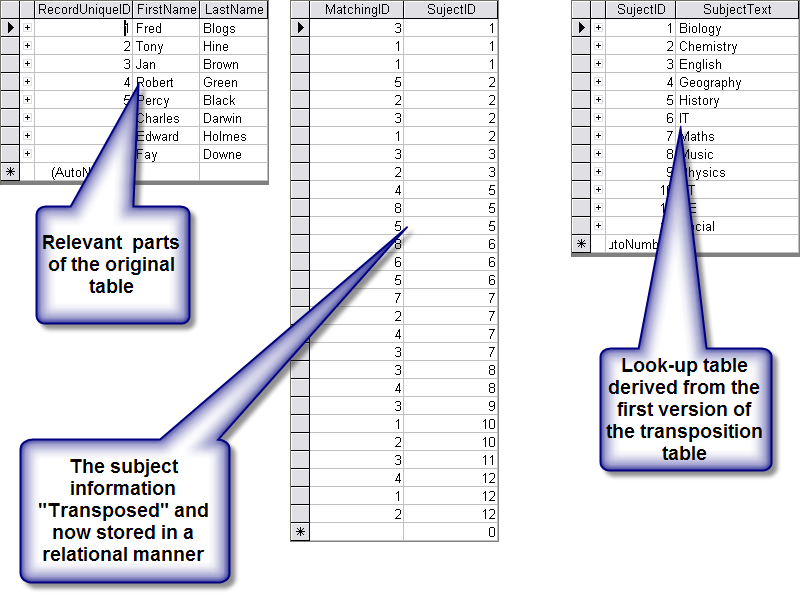
Using the normalization form we converted part of a spreadsheet type table into the beginnings of a relational table. From this table we derived a “look up table” now giving us a total of three tables, the remains of the first table, “tblStudent” (the student names), the next table “tblStudentSubject” stores the subject(s) related to each student, and finally a third table, “tblSubject” a “look-up table” to store the actual subject description.
Original Denormalized Table as 3 Normalised Tables
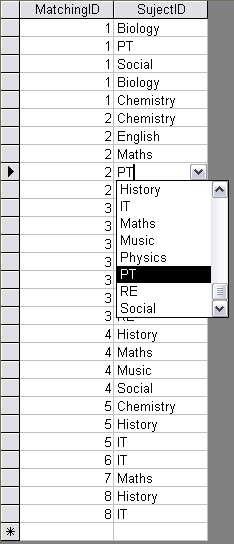
From the table “tblStudentSubject” we created a form in datasheet view:
Form based on Students List
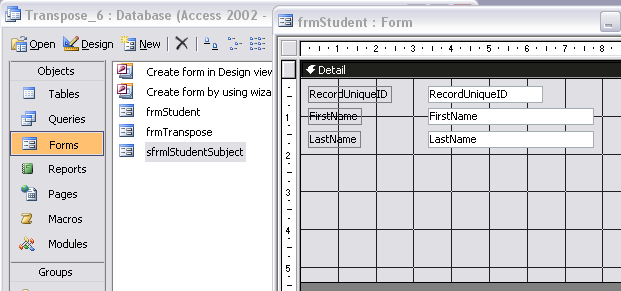
Now all we need do is combine this datasheet view form with a form based on the students list, and this will give us a form for correctly displaying the student names and the subject(S) the student is taking in one Form: Using the wizard create a basic form from the student table and name it “frmStudent” arrange its size so it has some open space as shown.
Form based on the Students list
Open “frmStudent” in Design View
Open “frmStudent” in design view. Once you have opened it up, create some room so that you can place the subform on it
frmStudent” in design view
Drag the subform “sfrmlStudentSubject” into the clear area on the student form “frmStudent”
Grab the highlighted subform:- “sfrmStudentSubject” Drag it over onto the form:- “frmStudent” where it will be added as a subform. This means it will be added within a subform/subreport control. Subform/subreport Controls are one of the advanced features that make MS Access superior to anything else!
Drag the subform “sfrmlStudentSubject” into the clear area on the student form “frmStudent”
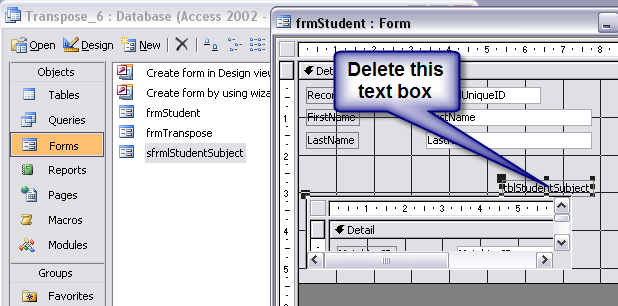
You may wish to delete the text box, you don’t have to but I usually find it looks better without it.
You can either change the text in the textbox to something more descriptive. Alternatively, you can delete the text box, it’s up to you!
You may wish to delete the text box, you don’t have to but I usually find it looks better without it.
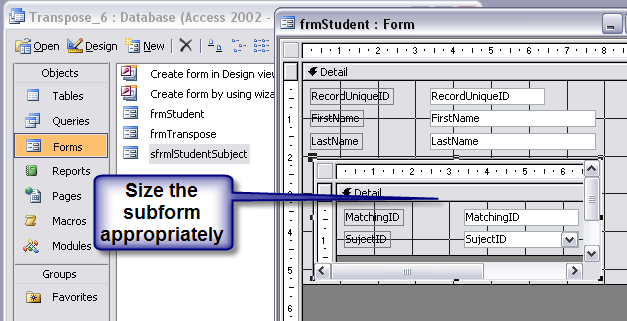
Size the Form to Suit
When you are in edit mode the subform looks like a single form with text fields in it. You have elected to make the form display in datasheet view so that it looks more like a spreadsheet and lists the matching records. You will need to size the subform/subreport control, the control containing the form, so that it looks correct. It’s a judgement call, I can’t help you with that…
Size the form to suit
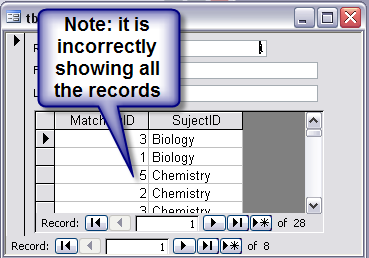
Note:- Showing the WRONG Records!!!
Now save the form and have a look, you will notice that it incorrectly shows all of the records in the subform. This is because there are no restrictions on the records being shown. You add the restriction by setting up the parent-child link between the form and sub form. This will restrict the records to just show the ones that are related to the record on the main form, the parent form…
Now save the form and have a look, you will notice that it incorrectly shows all of the records in the subform,
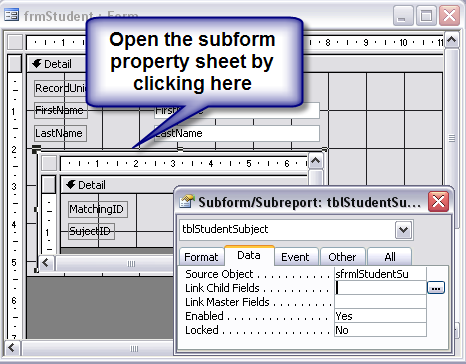
Open the Subform Property Sheet
The next bit is tricky, for two reasons, the form isn’t really on top of the other form, it actually sits in a subform window (correct name Subform/Subreport Control) and you need to gain access to the properties of this “subform window” by clicking on the tiny line that you can just see around your subform. This can be a difficult task to master first time. However there is an easy way to do this! Give me a shout, and I’ll tell you!
Open the Sub-Form Property Sheet
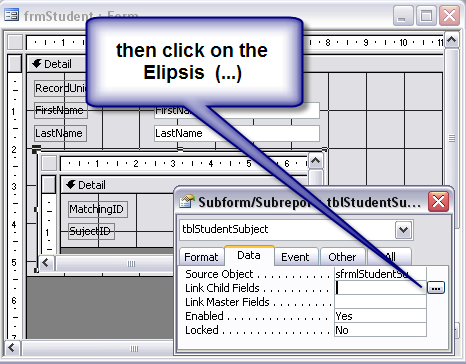
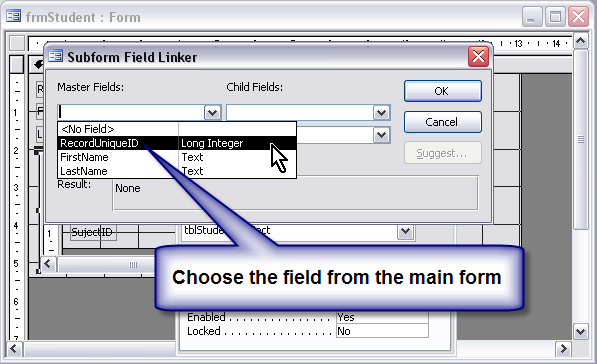
Now open the “subform field linker” dialog box by clicking on the ellipsis (…)
This opens the the master child field selection form. In this dialog form, you select the correct fields to link data in the two forms together. Normally, you need the ID Field In The Parent form, matching it to the data field in the child form.
Open the “subform field linker” dialog box by clicking on the ellipsis (…)
Link the two Forms Together
Select the fields which contain the data that link the two forms together, the master field will be the “Main Form” and the child field relates to the subform..
Select the fields which contain the data that link the two forms together.
Choose the Field from the matching Form
Match the master and child Fields from the master and child form.
Chose Field from Matching Form
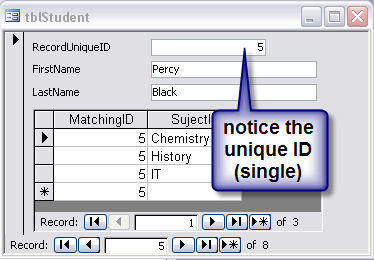
The master form ID and the subform ID(s) now match.
Notice how the master form ID and the subform ID(s) now match. You may wish to delete the ID field from the subform, it is not necessary for the maintenance of the link between the two forms. .
The master form ID and the subform ID(s) now match.
The master form ID and the subform ID(s) now match.
Single record ID in the main form/parent form. Multiple record IDs in the child form/Subform, where the records match (are related to the record in the parent form/ Main Form.
Single record ID in the main form/parent form. Multiple record IDs in the child form/Subform, where the records match (are related to the record in the parent form/ Main Form
This website uses third-party software - WordPress Add-Ins to be exact. I don't know what any individual add-in does, but I'm sure that many of them collect information about you. So be aware, if you continue using this site, then you are likely to be sharing your information. I don't know how to disable this sharing for any, or all of the plugins for individual users. So I can't stop the sharing of information. If this worries you then please do not use this site... If you continue to use this site I will assume that you are happy with it.